
Tags
D365, D365: DB-Server Installation with SQL, Dynamics CRM 2016, Installation, Minimum permissions, Multiple Roles, multiple servers, restricted environment, SSRS and Dynamics CRM Reporting Services, Step by Step Installation of Dynamics 365 (minimum permissions; multiple servers; multiple roles; without internet; restricted environment), Upgrade D365
Hello Everyone,
This is in continuation to the series of my posts:
Step By Step Installation of Dynamics 365:
- DB-Server Installation with SQL, SSRS and Dynamics CRM Reporting Services
- Web-Server Installation with IIS and Dynamics CRM Front_End_Role
- App-Server Installation with Dynamics CRM Back_End_Role
DB-Server Installation with SQL and SSRS:
Open the DB Server and double click on the setup application under the files to start the installer.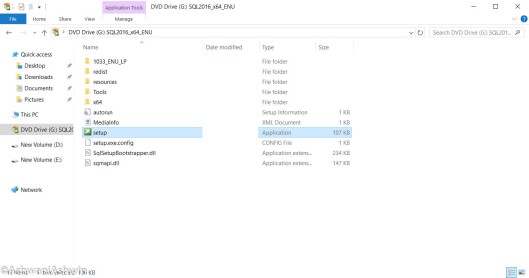
The action would then open the SQL Server Installation Center.
Click on the Installation option at the left panel of the window.
Under Installation click on the first link at the right panel of the window ‘New SQL Server stand-alone installation or add features to an existing installation’. This will start the installation operation.
Product key comes with the Installation package. Click Next to continue.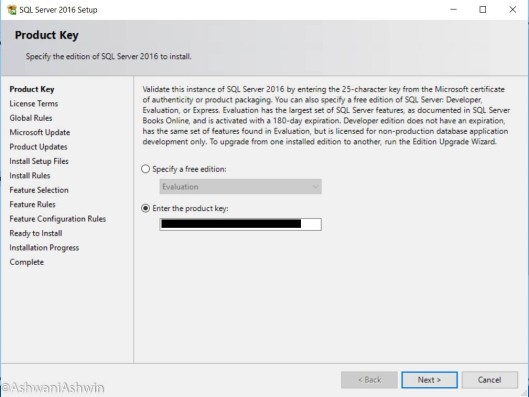
Accept the license terms and click Next.
Microsoft Update would be installed manually so simply ignore and click Next.
Due to no internet, the installer couldn’t check for any latest product updates hence the error. Click Next.
The Setup files will start installing the pre-requisites and check for other network related issues if any.
Due to no internet connectivity the .Net application security couldn’t be checked and presented a warning. Click Next.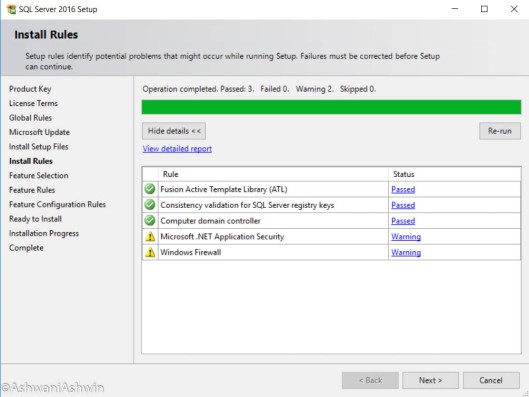
Check the following features under multiple selection and click next.
- Database Engine Services
- Full-Text and Semantic Extraction for Search
- Reporting Services – Native
- Client Tools Connectivity
- Integration Services
- Client Tools Backwards Compatibility
- Client Tools SDK


Under Instance Configuration, will keep the default Instance name – MSSQLSERVER. Click Next.
Under Server Configuration, specify the service accounts for each SQL Services created earlier.
Also update the Startup Type of SQL Server Agent as Automatic.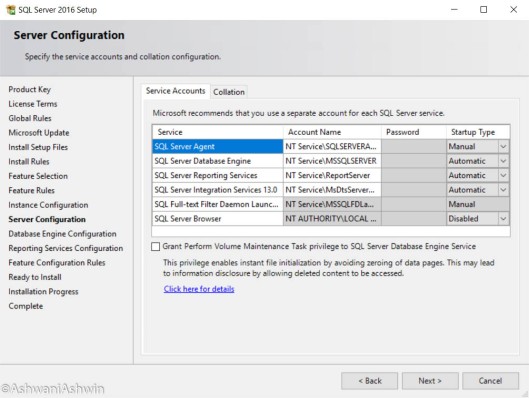

Use the Mixed Mode and use the same password as the CrmAdmin.
Also, click AddCurrentUser button to add the current admin user as the SQL Server Administrators.
Continue with the option Install and configure and Click Next.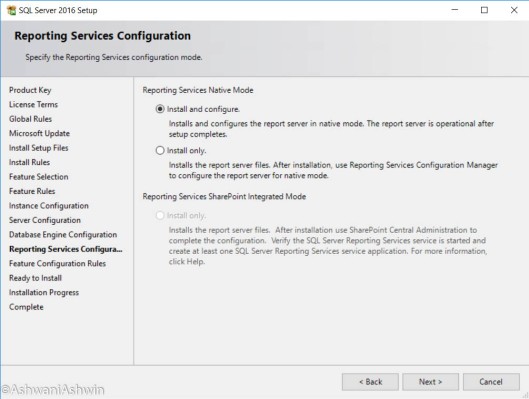
Cross check all the settings you mentioned previously before confirming the Install.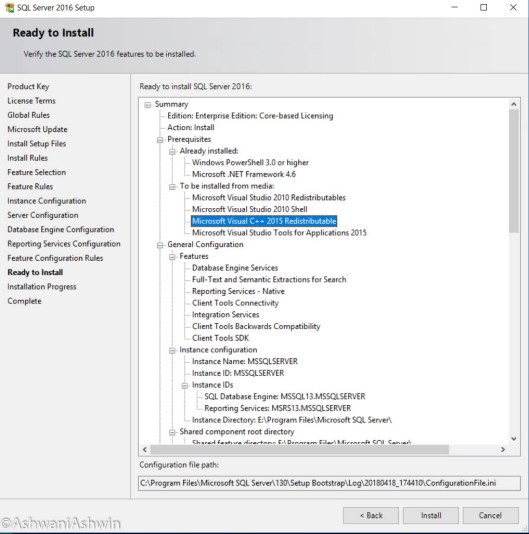
Click on the Install button. Installation will start and once completed will show the below screen.
Click Close.
Install the SQL Server Management Tool:
Browse back to the SQL Server Installation Center. Next is to Install the SQL Server Management Tool. Clicking this link will point to the SSMS download page. We would download a copy outside with Internet connection and run it inside the server.

Double click to run the pre-downloaded setup of SSMS.
Click on the Install button to start he Installation.
The packages will start loading and Install all the components one by one.
The installation will start after the package download is finished.

Once the Installation is complete, the server will request for startup. Click on Restart button.
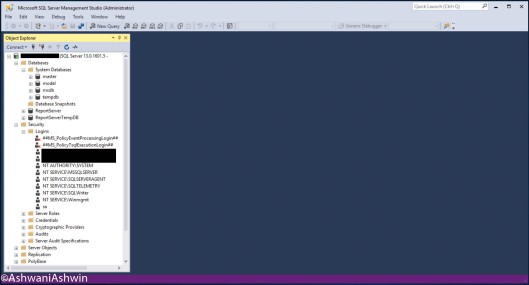
Open SSMS to confirm the application is running successfully and able to connect with your login credentials.
Minimum Permissions:
As part of the installation guide, the CRM deployment service account needs to have the full access to the SQL in order to create the Organization and Config Database while installing and configuring the new Organizations in CRM.
Create a new Login for ‘CrmDeployment’ under Server -> Security -> Logins 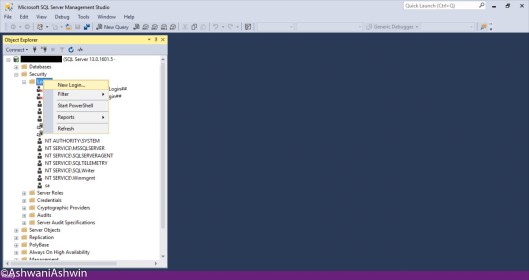
Add the account ‘CrmDeployment’ under the Login Name to search for the account to auto resolve.
Under Server Roles, provide the sysadmin role.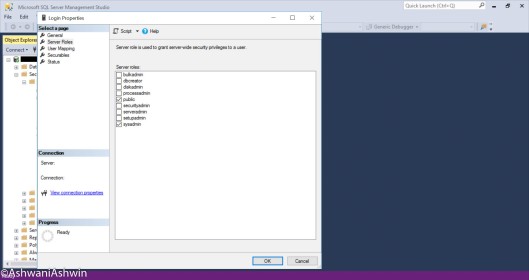

Click on Ok to create.
Even thought the SSRS is installed on the same DB-server, still I’ll proceed to perform the Next 2 steps:
I> Add the CRM installation account as the “System Administrator Role” at site-wide level in SSRS.
Browse to the Reports under:
Reporting Services Configuration Manager -> Web Portal URL 
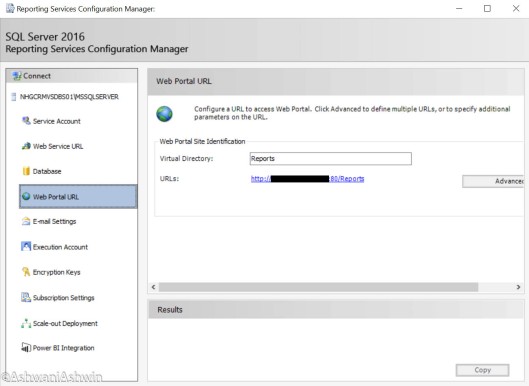
Click on the URL link to browse the reports page:
Under Settings, select the option ‘Site settings’
Click on the button ‘Add group or user’
Add the CRM installation user and provide the System Administrator role to it. Click Apply.
The next page will show the user added successfully.
II> Next add the CRM installation account as the “Content Manager Role” at root level in SSRS.
Under the same reports page, click Settings -> My subscriptions
Click on the Manage Folder button.
Click on the button ‘Add group or user’
Add the CRM installation user under Group or user and provide the Content Manager role to it.
Click OK.
The next page will show the user added successfully.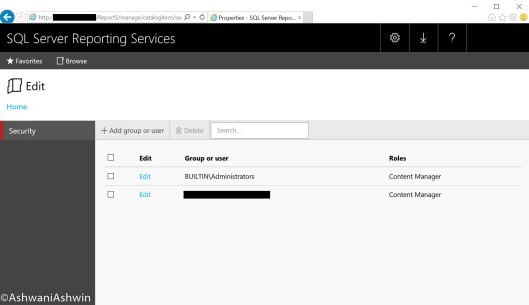
Again, as part of the installation guide the CRM deployment service account needs to be the member of the local Administrator under SQL Server:
Open Computer Management:
Browse to System Tools -> Local Users and Groups -> Administrators
Right click on the administrator and select properties
Click on the Add button to add the CRM deployment service account as a member.
Select on Apply and click OK.
Again, as part of the installation guide the CRM deployment service account needs to be a member to “logon as a service” rights.
Open Local Security Policy and browse to:
Security Settings -> Local Policies -> User Rights Assignment
Under Policy column, search for Log on as a service and right click to open Properties.
Select the button, Add User or Group and add the user account.
Click on Apply and select OK.
Now follow my Next Post to start the CRM Web-Server Installation here and App-Server Installation here.
Once the Web-Server and the App-Server Installation are complete, proceed to the next step of installing the Dynamics CRM Reporting Extension.
Dynamics CRM Reporting Extension Installation:
There is a configuration which need to be done prior to the installation else Dynamics CRM Reporting Extension installation will fail.
Kindly follow my next post for the details here: https://ashwaniashwin.wordpress.com/2018/06/17/microsoft-crm-setup-srsdataconnector-addbindingredirectforrdhelper-failed
Once the folder settings are updated, double click the CRM installation package to run the setup.

Extract the installation files to the D:/Dynamics365 folder and cancel the initial CRM setup.
Browse to the setup folder location: D:/Dynamics365/SrsDataConnector/
Double click to run the SetupSrsDataConnector.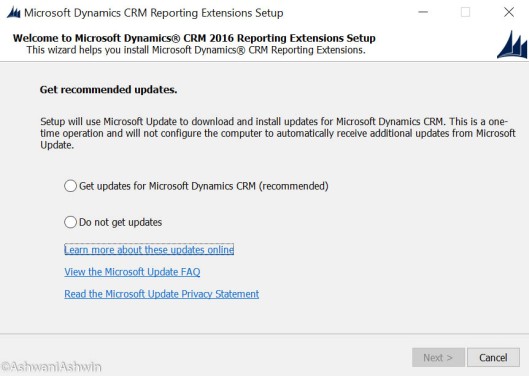
Select the option ‘Do not get updates’ and click Next to continue.
The installer will extract and copy the setup files in the temp folder to continue.
Accept the License Agreement.
The setup will indicate to install the pre-requisite required. Click on the Install button to install it.
Once the installation is completed, click on Next to continue.
Next page specify the DB server.
Next page specify the SSRS instance that will be used for reporting: MSSQLSERVER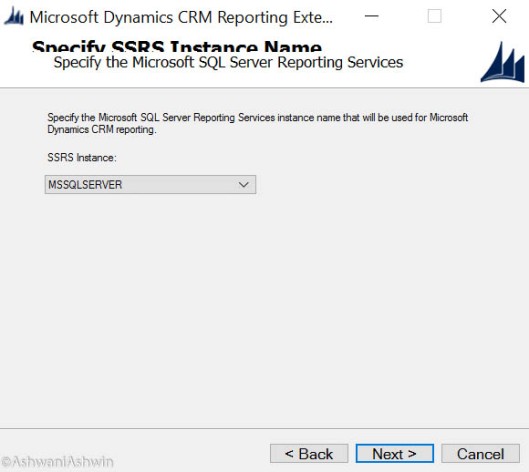
Select No for Microsoft Update and click Next.
Specify the installation directory.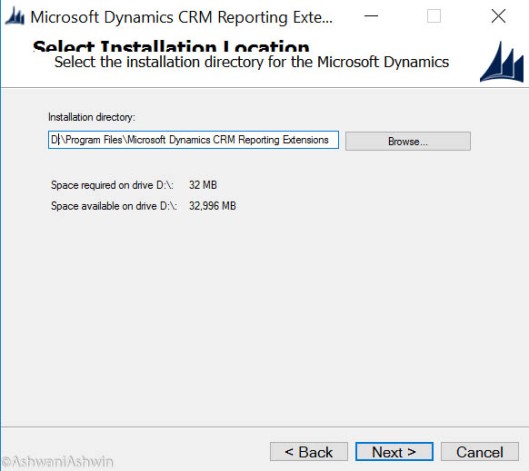
Upon clicking to Next, the system will check for all the input configurations and system tasks for any error before the installation.
Upon successful validation, click Next.
The installer will point out the services that will be restarted during the setup. Click Next to continue.

The final review page to note the configuration. Select Install to continue.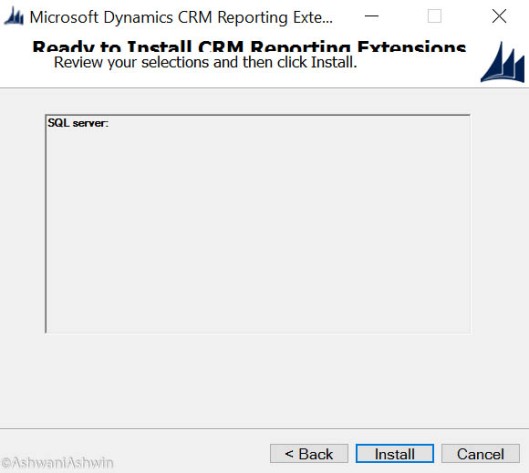
The installation will begin.
Upon successful installation, the log file will be generated. Save the log file for future reference.

Click Finish to continue.
Browse next to the Web-Server installation.

Pingback: Web-Server Installation with IIS and Dynamics CRM Front End Role | Ashwani.Ashwin
Pingback: App-Server Installation with Dynamics CRM Back End Role | Ashwani.Ashwin
Pingback: Step by Step Installation of Dynamics 365 (minimum permissions; multiple servers; multiple roles; without internet; restricted environment) | Ashwani.Ashwin
Pingback: Upgrade MS CRM 2015 to CRM 2016 and D365 (On premises) Phase 1 – mohitsharma