Cluster accounting failed : extra cluster in $Bitmap – GParted Error

Tags

, , , , ,

Hello Everyone,

In my last blog, I was demonstrating the use of GParted in resizing the disk space and quickly shifting the unallocated space to the other side helping drives to extend. While demonstrating, everything was working fine as expected, until I encountered this error at the last step.

Cluster accounting failed : extra cluster in $Bitmap

Error: NTFS is inconsistent. Run chkdsk /f on Windows then reboot it TWICE!

The best part of this issue was, it already came up with the solution!

This issue happens when there are issues and bad sectors in the disk. Executing this command chkdsk /f does the quick fix for the such issues.

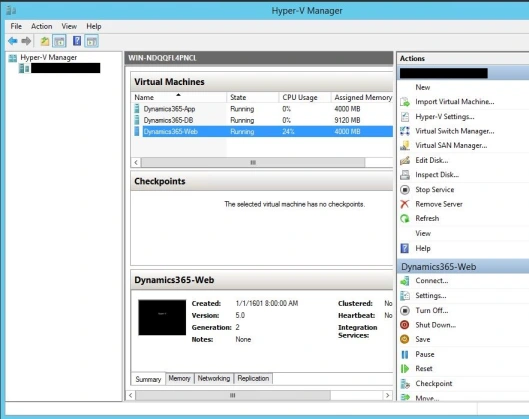
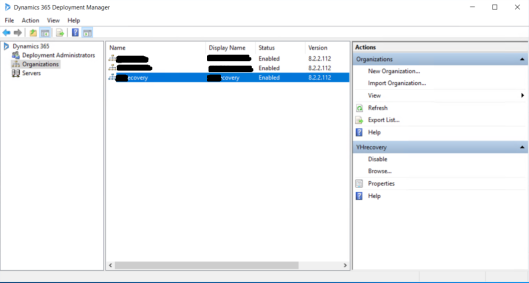
In my case, I knew I also had some files which were already running and in use. I went to the Windows Service and stopped them temporarily.

CHKDSK:

CHKDSK, short for Check Disk, is a utility that checks the integrity of the files and file structure of your hard disk.

CHKDSK Parameters:

  1. Drive (X:)

Chkdsk  by defaut operated in current disk which is generally C:/

To run it on different drive need to add the drive name followed by a space.

Chkdsk D:

2. Fix Issues (/f)

In order to check for the issue and fix them, need to include /f as a parameter

chkdsk D: /f

3. Repair (/r)

In order to check for the bad sectors and repair them, need to include /r as a parameter

Generally ‘/r’ includes the functionality of ‘/f’ as well. But running together will give me assurance that my disk has been checked thoroughly twice!

Since I was shrinking D:/ drive and error occurred in it, hence I logged into the Windows, open CMD and executed the below code:

Chkdsk D: /f /r

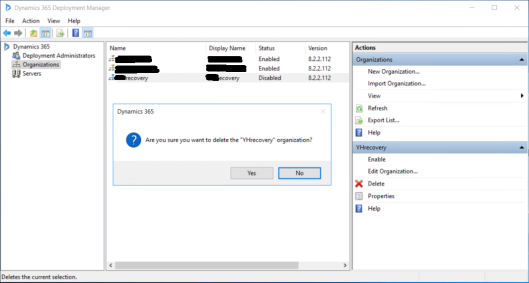
Once completed. I rebooted my windows twice as mentioned in the error description.

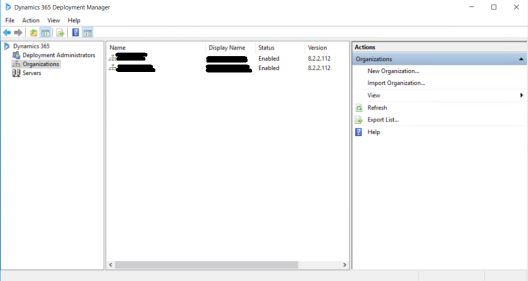
I booted the drive with Gparted and repeated the same shrinking D:/ exercise. And Voila, this time it worked without throwing and more errors! 😀

I’ve shared all the screenshots which I worked upon. Hopefully this would be helpful to someone. Thanks! 🙂

Extend C:\ drive in Windows for Hyper-V using GParted

Tags

, , , , ,

Hello Everyone,

In my last post I discussed a simple approach for moving the unallocated space between the drives. However, if there are multiple partition/drives in between then extending the left most drive in series would be quite cumbersome. I thought about that scenario and wanted to give that a try using a third party tool.

GParted is a free partition editor for graphically managing the disk partitions. So in this post, I’ll guide everyone step by step on the most challenging task, which is moving the unallocated space between the drives (using this free tool). This is very simple, hassle free and time saving! 😀

And the best way to do this is:

  1. Extend the drive D:/ with the Unallocated volume space using Disk Management
  2. Run the GParted by booting the .iso file
  3. Use GPartedto shrink drive D:/ from the left side
  4. Extend the drive C:\ using Disk Management

To start with, we would add additional drive volume in Hyper-V for a particular VM. (Kindly view my last post on how to add additional volume to a .vhdx file in a VM.)

  1. Extend the drive D:/ with the Unallocated volume space using Disk Management

Upon allocating the additional space for C: drive extension, we would first proceed with extending the D:/ volume using Windows Disk Management. This is required for the next step.


2. Run GParted by booting the .iso file

a. Need to download the latest GParted-Live .iso file from here.

b. To mount this downloaded .iso file, need to add the DVD Drive in case the VM doesn’t have it.

c. For this .iso file to boot, the major step in the Hyper-V would be Disable the Secure Boot.

d. Also make sure the DVD Drive is the first in boot sequence order.

e. Start the VM and if all the settings are correct, you would see this Start screen of GParted (GNOME Partition Editor). Keep using the default value by pressing the Enter key.


3. Use GParted to shrink drive D:/ from the left side

Once Gparted is launched, select the drive D:/ and select the button Resize/Move the selected partition to shrink drive D:/ from the left side; this would leave the unallocated space next to C:/ drive for further extension.

Upon confirming the shrinking and moving space of D drive, click on Apply. Incase you’re experiencing the issue as demonstrated in screenshot below, kindly browse my next blog for the resolution.

Else if everything is alright, then you would see the same as screenshot below:

Upon successful allocation of the space between the drive C:/ and D:/, log out of the GParted, remove the DVD mounting GParted-Live .iso, enable Secure Boot and boot the Windows VM.


4. Extend the drive C:\ using back Disk Management

As the complex task has been completed in minutes using GParted, It’s time to go back to the Disk Management and finish off the last stage of C:/ drive extension.

Finally, I was able to Extend my C:/ drive with some extra space without much hassle and saving time.

I struggled days to figure out various other tools available for disk partition and resizing, but all seem to be paid version. Hope this would be helpful to someone in need saving their time and money both. Thanks! 😉

Extend C:\ drive in Windows for Hyper-V using default Disk Management

Tags

, , , ,

Hello Everyone,

I started a CRM POC in a new server with very little configuration. Later kept using the same for the project. After almost more than a year, I realised that I would need more space in my C:\ drive as the system is running out of space due to cumulative system updates and backup files. 

Generally, extending the Drive volume can be easily be done using Disk Management when you add some unallocated volume space.

It would run through a series of steps in a wizard and very easily you would be able to allocate extra volume for the hard drive C:\ to extend. But unfortunately, when you have Drive C:\ and D:\ together, then you wouldn’t be able to extend Drive C:\ alone. This is because the options for Extend Volume is disabled.

Whereas, the drive D:\ can be extended easily with the options of Extend Volume Enabled.

The main reason being; there is a partition/drive (in my case it’s drive D:\) between the drive C:\ and the unallocated space.  Hence the reason there is no issues in extending the drive D:\ as it has the unallocated space right next to it.

So, in order to extend the drive C:\ , we need to make sure that there is no partition/drive (drive D:\) between C:\ and unallocated space. Basically we need to bring the unallocated space right next to the C:\ drive.

And the best way to do this is:

  1. Shrink the current Volume D:\
  2. Create a new drive Volume (E:\) from the Unallocated space.
  3. Cut-Paste all the contents from drive D:\ to E:\
  4. Delete the drive D:\ to change to change the status to unallocated space next to drive C:\
  5. Extend the drive C:\
  6. Rename the drive E:\ to D:\

I’ll be demonstrating all the points steps by step below:

  1. Shrink the current Volume D:\  so that you can add more space to the later new drive D (enough space for file transfer later)

Right click on the drive D:\ and select the option to Shrink Volume.

2. Create a new drive Volume (E:\) from the Unallocated space.

Right click on the unallocated disk and select the option to create ‘New Simple Volume’.

It would run through series of steps in a wizard. Simply click on next choosing the default options as they are recommended and drive E:\ will be created.

3. Cut-Paste all the contents from drive D:\ to E:\

Next would be to transfer all the contents to the new drive.

4. Delete the drive D:\ to change the status to unallocated space next to drive C:\

5. Extend the drive C:\

Now that we have the unallocated space beside drive C:/, the Extend Volume option would be enabled.

6. Rename the drive E:\ to D:\

Though this step is optional but it would be very helpful in case you have some reference files in an object and it searches for then in Drive D:/

Finally, I was able to Extend my C:/ drive with some extra space.

This is a simple and a better approach for moving the unallocated space between the drives, in order to help extend the next partition/drive. If there are multiple partition/drive then this process becomes quite complex and cumbersome. I’m going to discuss another approach of doing the same with a free (open source) 3rd party tool with much ease in my next blog here.

Hope this would be helpful to someone. Thanks! 🙂

Dynamics 365 graphic icons missing in Internet Explorer

Tags

, , , , ,

Hello Everyone,

Recently, one fine day when I logged into my server to check a functionality in CRM; I noticed something very strange. I couldn’t find the Advance Find button! Not only that button was missing, all the rest ribbon buttons on the right were missing including – Global Search, Recently Viewed Items, Add new, Settings and Help. Though the functionality were still available as I could click in the designated area of missing icons and continue with the action.

The things got a little more scary when I ran my personalised report and noticed all the report icons were missing too, instead there were replaced by alphabetical letters.

I knew something went wrong with the CRM Icons. To double confirm, I even opened Report Server and found the similar missing Icons from the ribbon.

As a first thought that would click anyone would be – Did something went wrong with the _imgs folder or certain specific subfolder under _imgs folder has missing access permissions? I cross-checked most of the basic ones but couldn’t find any difference from my other environment.

Then the second alternative for us developers are Developer Tools (F12). Initially, I tried to cross check the reference icons and I was able to find them all under _imgs folder. But later, when I reloaded the main page under developer tools, I found the error:

@font-face encountered unknown error.

@font-face failed OpenType embedding Permission check. Permission must be Installable

I found the same error with Reports and Report-Server page load under Developer Tools(F12).

So basically, these icons were font icons and were having problems to load only while using Internet Explorer. B’coz when I checked the same in other browsers, it was all fine. I read about the error in detail and found the 3 main causes for CRM right navigation doesn’t display the icons.

  1. Blocking Untrusted Fonts Feature is configured in Windows 10
  2. Allow Font Downloads GPO is disabled
  3. Antivirus prevents the font icons from displaying

Not to much surprise, Microsoft recommends to switch to Edge to avoid these font-face problems. However, I was determine to use IE so I went ahead to check and fix the Windows feature instead.

I opened registry editor – regedit.exe in my server and browse to the following location:

HKEY_LOCAL_MACHINE\SYSTEM\CurrentControlSet\Control\Session Manager\Kernel\

I checked the value for the MitigationOptions and it’s value was set to 1000000000000 (in Hexadecimal) which means the feature was turned ON. In order to turn OFF this feature, I had to set it’s value to 2000000000000 (in Hexadecimal). After setting the values I restarted my server and voila, my font-face icons were back!! 😀

Microsoft article on the same here for reference. Hope this would be helpful to someone. Thanks!

D365 – Gmail Server Profile Settings

Tags

, , , ,

Hello Everyone,

Every time when I create a new Organization in Dynamics CRM, for the purpose of email testing I’ve to configure the mailboxes in my test environment. The very best and easy way for me configuring the mailboxe Server Profile are Gmail. Today in this post I’ll be sharing the settings which I use to configure the Gmail mailboxes.

Browse to Settings -> Email Configuration -> Email Server Profiles

On the ribbon, select the dropdown for button New as POP/SMTP Server

For Gmail Server Profile, below are the  settings:

Incoming Server Location: pop.gmail.com
Outgoing Server Location: smtp.gmail.com
Credentials: For both Incoming and Outgoing, I'll leave the authentication settings to be set to - Credentials Specified by a User or Queue
Advance:
Incoming Port: 995
SSL: Yes
Incoming Authentication Protocol: Auto Detect
Outgoing Port: 587
SSL: Yes
Outgoing Authentication Protocol: Auto Detect
Process Email from : Put this to the current/previous date
Minimum Polling Interval in Minutes: 0 (default)
Maximum Concurrent Connections: 10 (default)

Click Save.

Now we would configure a Gmail Mailbox. For the testing I’ll configure my test Gmail account (which I usually use for all CRM test emails) to my user account in CRM.

Browse to Settings -> Security -> Users

Update the email Id of one of the user to a existing Gmail id and select Approve Email.

Now browse to the bottom of the user page and expand the tab ‘Administration’

Click on the Mailbox to continue configuring.

Setup the General information like Email-Id and Name.

Specify the credentials to use for the Gmail-id

Set the Server Profile to use the one which we just created above.

Incoming/Outgoing Email set to Server-Side Synchronization

Click Save. Configuration completed!

Next, on the ribbon bar for the mailbox click on the button ‘Test & Enable Mailbox’.

Refresh the page for after a while and the Incoming/Outgoing Email Status would be changes from ‘Not Run’ to ‘Completed’

You could also check for the mailbox alerts to be all successful.

The same could be repeated for any users/queues for synchronizing their Gmail accounts.

Hope this would be helpful to someone.

Thanks! 😀

Delete an Organization in D365 On-Premise

Tags

, , , ,

Hello Everyone,

As part of the Disaster Management, I was performing a Dynamics CRM recovery exercise for my On-Premise. Meaning, creating a new CRM Organization from the DB backup which we run daily overnight. After the DB restore was completed and the CRM Recovery Organization was up and running; It was time to delete the Organization to save the disk space and system resources from being utilized unnecessarily.

Note: Before you delete an organization, you need to Disable it first.

Open Dynamics 365 Deployment Manager. Under Organizations section, select the CRM Organization that you wish to delete:

Under Actions pane, click on Disable. You will be notified for confirmation on the selected action, select Yes.

Now under the same Action pane, click on Delete. You will be notified for the confirmation on the selected action, select Yes.

Notice the Organization is deleted from the list of CRM Organization

Now when you try to browse the CRM Organization link (one which just got deleted), notice a 404 – Page not found error.

You would wonder that the deletion process is completed, but No! The database that was created initially for the Organization still exists in DB.

To confirm the connections for the recovery Organization has been removed from CRM, you can run a simple query below under MSCRM_Config.

select * from Organization

As a result you would only see the existing Organizations.

Simply right click on the redundant Organization database, and select Delete.

Make sure you select the option to close all the existing connections before you click ok

Notice the DB is deleted as well. Process completed now! Hope this was helpful to someone.

Thanks! 🙂

You are attempting to create a user with a domain logon that is already used by another user : CRM User Creation Error

Tags

, , , ,

Hello Everyone,

As a CRM Administrator for On-Premise, we all have come across this error once : “You are attempting to create a user with a domain logon that is already used by another user…

Generally, this error occurs when we are trying to create a user which already exists in the Organization i.e. in Backend, adding user with same AD-SID (Security IDentifier) under MSCRM_Config table.

There is a very nice blog which explains in detail about the different scenarios of this error and their solution: https://celedonpartners.com/blog/reconnect-active-directory-accounts-dynamics-crm/

However, I came across another different rare scenario which I would discuss here. I have a D365 multi-organization environment setup with a list of existing CRM users. For one of the Org-B, we added the user and hours later for some unspecified reasons (bad Integration data affecting multiple core tables :/ ) we had to do a quick DB Restore. After the DB restore, neither that recently added User was not able to login nor I wasn’t able to add the same user again; faced the similar error –  You are attempting to create a user with a domain logon that is already used by another user…

Cause:

So when we added the user to this Org-B, a new SystemUser record was created under the OrgB_MSCRM DB. And a related record was created for SystemUserOrganizations under MSCRM_Config DB referencing to the Organization-B and the UserID based on the AD-SID.

But after the Organization-B was restored, the new user record for SystemUser under OrgB_MSCRM went missing but the related record with Org-B and User-ID still exists in the MSCRM_Config DB. Due to this reference, I couldn’t add the same user again in Org-B and kept giving me the below error:

When the user try to logon to the CRM, the following error prompted:

Error Logging to CRM Org-B

Solution:

The only easier way I could think of was deleting that additional reference from the SystemUserOrganizations under MSCRM_Config DB. Please note this approach is not recommended and highly unsupported and always keep a backup of the DB’s and the encryption keys before performing any such action with the DB directly.

With few relational queries I figured out the User-ID and the reference record which I needed to delete for Org-B. Under MSCRM_Config DB, I ran the below query one last time to confirm I was pointing to the correct record:

Select* from SystemUser

where Id = 'A6797AA8-4857-E911-9C2D-00155D00AB0C'

Select* from SystemUserAuthentication

where UserId = 'A6797AA8-4857-E911-9C2D-00155D00AB0C'

Select * from SystemUserOrganizations

where UserId = 'A6797AA8-4857-E911-9C2D-00155D00AB0C'

--and OrganizationId = '386CEC94-7CD6-E811-9C2B-00155D00AB0C'

After I ran the select query , you can notice the additional reference record to Org-B in the results.

I finally ran the query below and deleted the reference record under MSCRM_Config DB.

/*

Delete SystemUserOrganizations

where UserId = 'A6797AA8-4857-E911-9C2D-00155D00AB0C'

and OrganizationId = '386CEC94-7CD6-E811-9C2B-00155D00AB0C'

*/

Everything went well and I was able to create the user record again in Org-B.

Hopefully this will be helpful to someone who got caught in a rare situation like this.

Thanks! 🙂

LDAP Query : Fetch User information from Active Directory in different Domain Controller

Tags

, , , , ,

Hello Everyone,


This week I got a task to perform a LDAP query and fetch few user information. Challenge was to perform the fetch action not from our current domain but rather a different domain; that too not with FQDN but with IP. This was not too tricky as all I need to do was configure the DirectoryEntity first and then pass it to the usual DirectorySearcher which we use to perform LDAP.


Let me explain that in detail, step by step:


1> I started with creating a new Console App in Visual Studio.


2>  To begin with, I needed to add the System.DirectoryServices (for LDAP) and System.Configurations (for configuration file) as assembly references. 


3> Initialize the DirectoryEntity object with the following:

    • Authenticating accountId
    • Authenticating Password
    • LDAP path (can either be Server IP containing AD <“LDAP://10.10.10.10”> or the FQDN of AD <“LDAP://DC=mscrm,DC=com,DC=sg”>)


4>  Initialize the DirectorySearcher object with the DirectoryEntry.

This would do a DNS lookup to find a DC where the AD resides.

I used the DirectorySearcher.SearchRoot.Path to check if the path is set correctly for LDAP.


5> Now it’s time to set the filter properties of the DirectorySearcher with the LDAP query.

I’ll pass on the LDAP query to Configuration Manager AppSettings as the query will change from time-to-time.


6> Once everything is set, it’s time for the results. Results are captured using SearchResult with:

    • FindOne() – when fetching a specific user details with 1 results only. Something like in SDK we have IOrganizationService.Retrieve Method
    • FindAll() – when fetching multiple users with a filter criteria. Something like in SDK we have IOrganizationService.RetrieveMultiple Method 


7> Build the code and .exe is ready to be executed in the server. 🙂

The App.config file will be like this


8> And the final Result of query, if everything falls in place correctly.


Hope this was helpful. Thank much!  🙂


List all advanced configuration options in MSSQL with sp_configure

Tags

, ,

Hello Everyone,

While writing the Technical document, we all would need to specify the configuration options details of the SQL Server which was Installed on Dynamics Server along with the version and the Instance Name.


The SQL configuration options can be fetched from the master table using the query:

Exec sp_configure

sp_configure_1


However, this is not all the options. To show all the advanced options need to run the following query:

1. EXEC sp_configure 'show advanced option', '1'

sp_configure_2

Upon successful query execution, the result will show the following message as in image above.


2. RECONFIGURE; 

sp_configure_3


Now when I execute the query sp_configure, I see many result rows.

sp_configure_4


Many other syntax and features about sp_configure are documented in MS article. Hope this will be helpful.

Thanks ! 😀