
Tags
Configure Remote Desktop connection to Hyper-V Virtual Machine, Hyper-V, Remote Desktop, Virtual Machine
Hello Everyone,
This is one necessary things which needs to be configured everytime a Hyper-V Virtual Machine is configured on a new system. I am writing this to remind myself of the steps needed for the same.
Currently I’m having windows server 2008 both as my host and virtual machine. Reason being I need to maintain different environment for different versions of CRM.
Ok, now there are two ways to bring the Virtual system on Remote Desktop:-
1>
a> On the virtual machine open Remote Settings:–
My Computer -> Properties -> Remote Settings 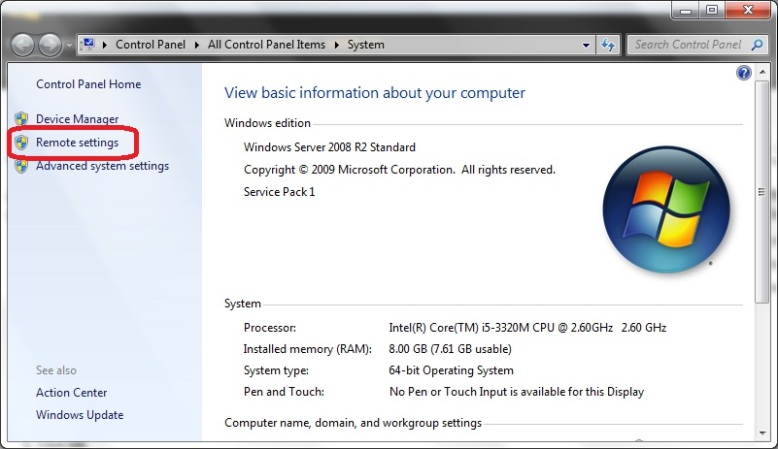
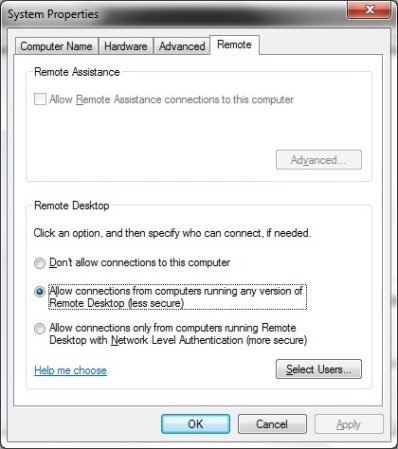
Select the Allow Connection option as shown in the above image.
b> Now, we need to open the firewall for Remote Desktop:-
Move to Start -> Control Panel -> Windows Firewall -> Allowed a Program or Feature through Windows Firewall
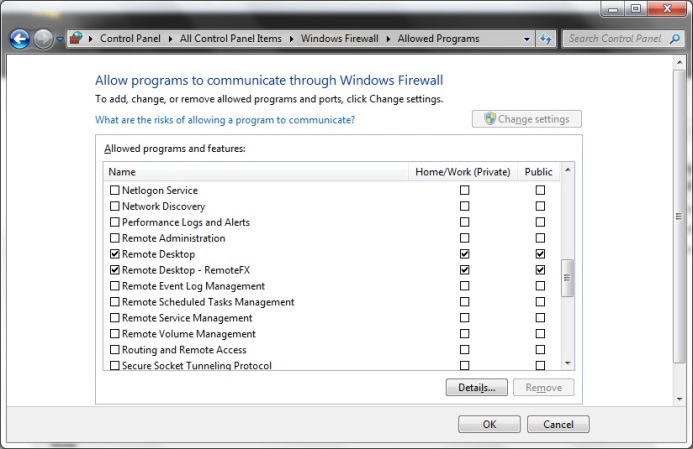
Check the boxes next to Remote Desktop.
Now after you Restart the System, you can take the Virtual Machine on remote through the Computer Name. In my case it was like “Ashwin”.
2>
Create two different types of network connection in your virtual machine(i.e. Internal and External)
I have my Hyper-V with a virtual Machine named “Ashwin CRM”. Select Virtual Network Manager.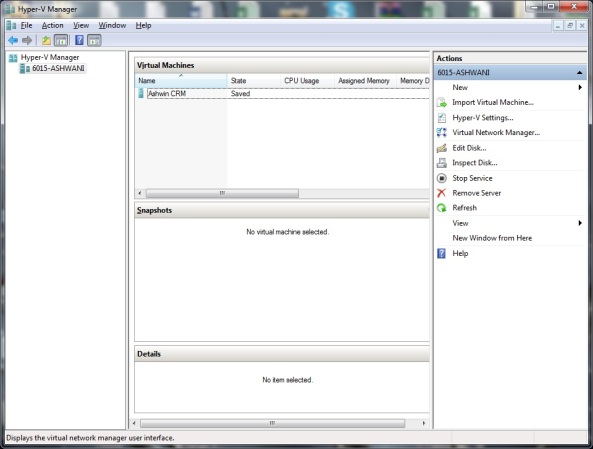
Under New Virtual Network, Add an External network.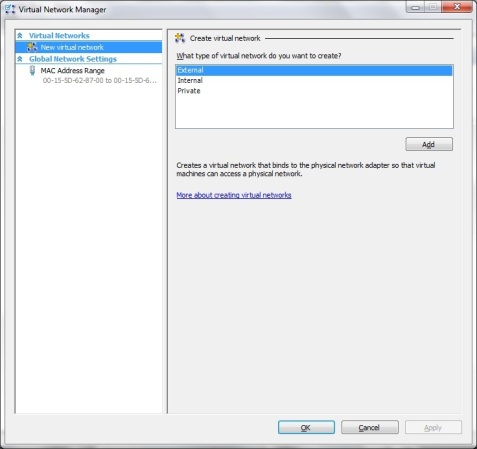
I named the External Network as “Ashwani External Network” with connection type as External. Click Apply.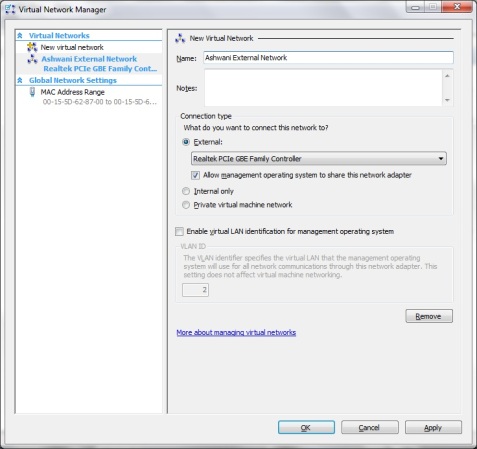
You might get an warning regarding network connectivity. 
I clicked ok and applied for the changes. 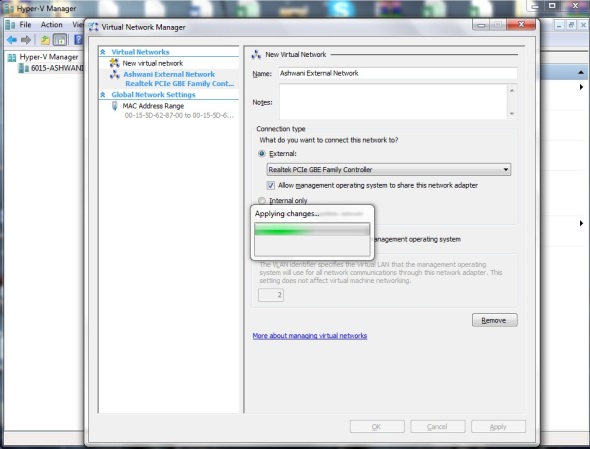
Similarly, Add an Internal Network.
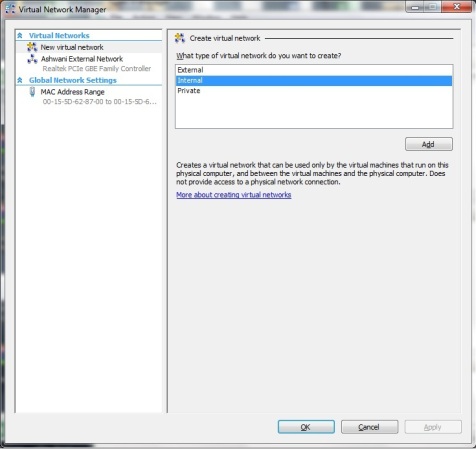
I named this network as “Ashwin Internal Network” with connection as Internal.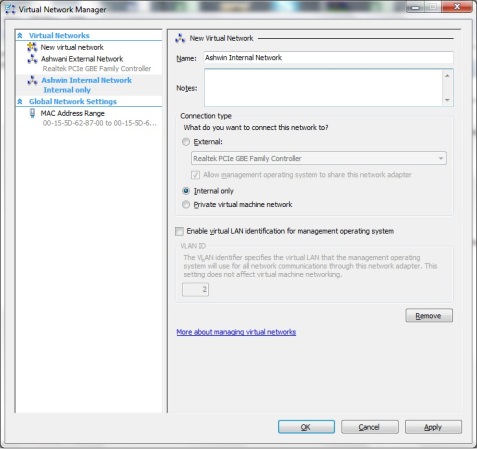
Add both the networks under the Settings of the Virtual Machine.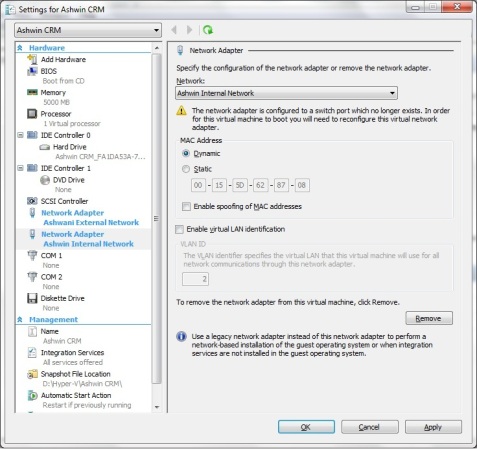
After this in the host system, you will find both the networks. Under External network, select its sharing with the Internal network.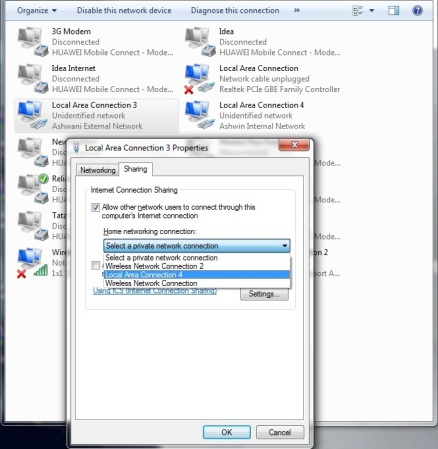
After sharing the network in host machine, you will see the below changes on network in the virtual machine.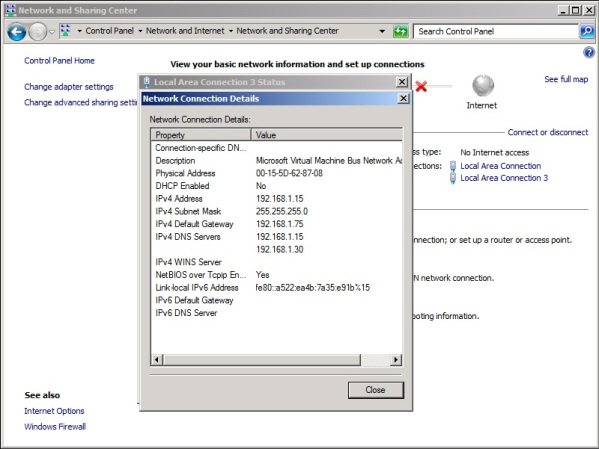
You need to change the TCP/IPV4 configuration to obtain IP address Automatically. 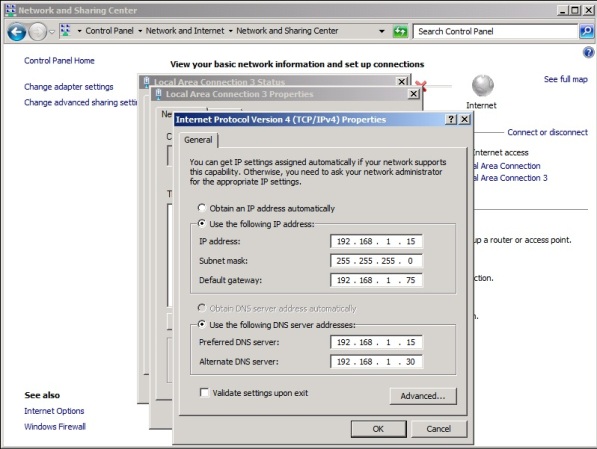
Just the same like the image below.
After making the mentioned changes, the DNS will be changed to 192.168.137.1 and the IP will change something to 192.168.137.XXX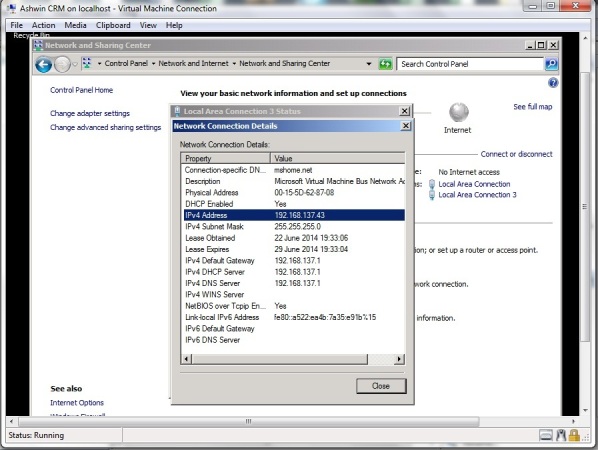
Now this fixed IP can be used to take the system on Remote everytime you log on to virtual system.
Hope this will be helpful to others as well.
Thanks !!!
😀

Pingback: Hyper-V did not find virtual machines to import from location : Hyper-V Import Virtual Machine Error !!! | Ashwani.Ashwin
Hi
Great post, very helpful. I have one question why do you need an Internal Network Connection?
thanks for this post
i can connect remotely from the host serverto VM , but i cannot connect remotely from another computer in the same network and i can connect remotely to the host server.
what can i do?
Hello,
this is a very helpful post. these instruction were difficult to find. Thank you.
Thank you. I’ve been fighting with the screen resolution for so long
Very nice summary, sir. This article helped me setup my remote internet access, no problem!
This worked perfectly for me. Thank you very much!
This was great to find and still helpful in 2020! Can you do a write up for Windows 10 as well? Some of the screens look different now.
Pingback: Server Bug Fix: Windows Server 2012 Hyper-V RDP from anywhere - TECHPRPR
Pingback: Configure Remote Desktop connection to Hyper-V Virtual Machine – Habits…